Speed Painting Hack Using Coloured Primer
Hey there, I just had this idea about using coloured primers applied with a brush to combine priming with base coating as a speed painting hack. So let us try it out!
It is a similar idea to that behind contrast paints. Contrast paints combine a layer paint with a runnier wash of darker colour. This saves a little time as you are combining what would usually be two different steps, a basecoat and a wash into one step.
Similarly, priming and basecoating are usually separate steps. If we could combine priming with basecoating then that will become just one step and save us a bit of time.
Of course part of this idea is not strictly new. Army painter has a nice range of coloured primers you can use to combine priming with basecoating. However this range of coloured primers are all in spray can format. This limits them to applying what I call auto-primed base coats for models which will mostly be all one colour, say for example an Ultramarine Adeptus Astartes or something like that.
Find Army Painter coloured spray can primer here.
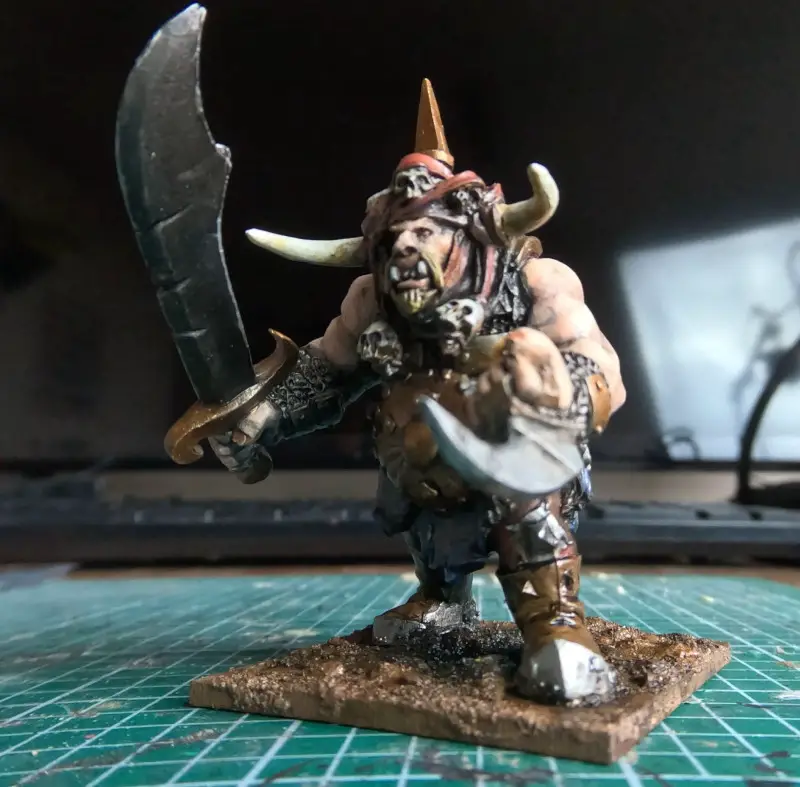
This ogre however has large areas of skin, leather, various cloth and metals for armor and weapons. There is not one base colour that covers most or all of him. If your model will have many differently coloured areas like this then using a crude tool like a spray can will not do. Even an airbrush does not allow for fine control enough.
Basecoating with Brushed On Primer
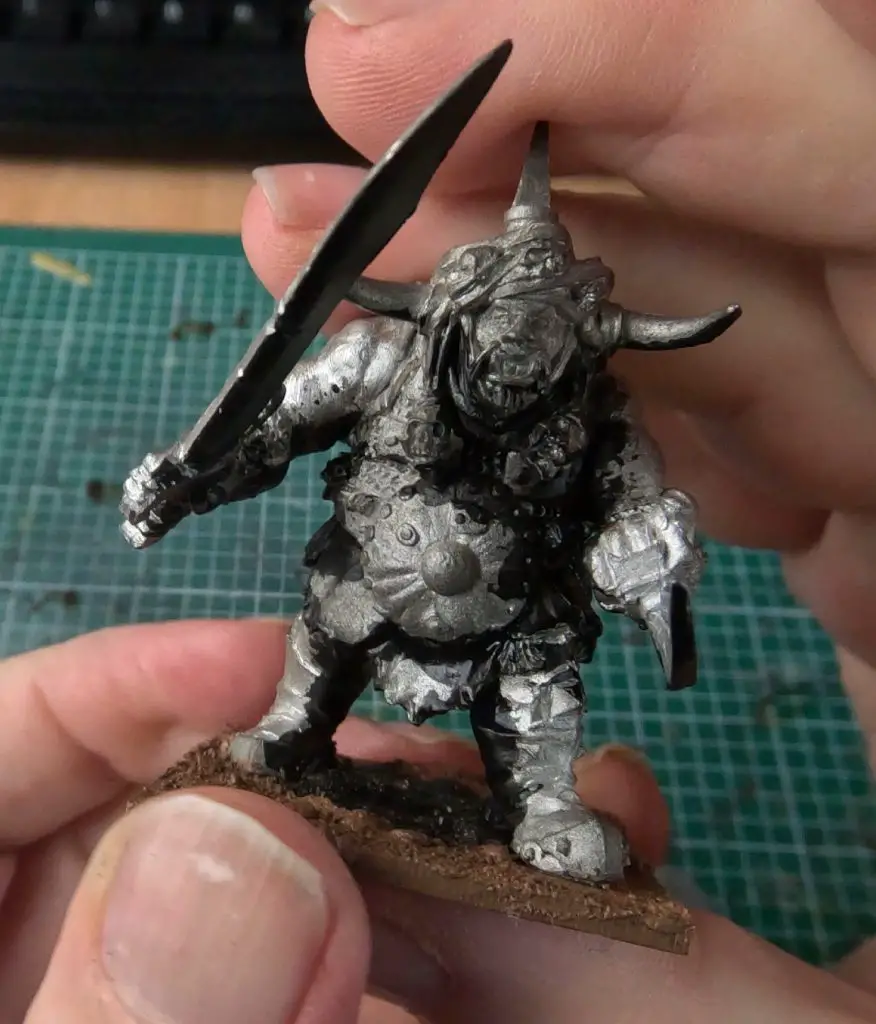
Alright so let us see how we can do this. Here is the ogre we saw earlier but right at the beginning of the painting process. He has been assembled and stuck to a base and is now ready for priming.
Well I did get a little ahead of myself as I have started putting down some black primer with a brush and priming the base with brown. Still he is mostly bare metal at this point.
The black primer I have put down is to form what I am going to call the macro shade. It is on the parts of the model heavily shaded from an imaginary overhead light source. That is the inside of the legs, underside of torso, underside of arms including weapons and of course the shadow his big body casts upon the ground.
You can think of it as a zenithal shade for those familiar with the zenithal highlight technique.
The Primers Being Used in This Experiment
The primers that I am using for this experiment are Vallejo’s surface primers formulated for the airbrush. They can be used with a brush just fine though and indeed because they are thin enough to go through a airbrush they don’t really need to be thinned as you often would do with brush paints.
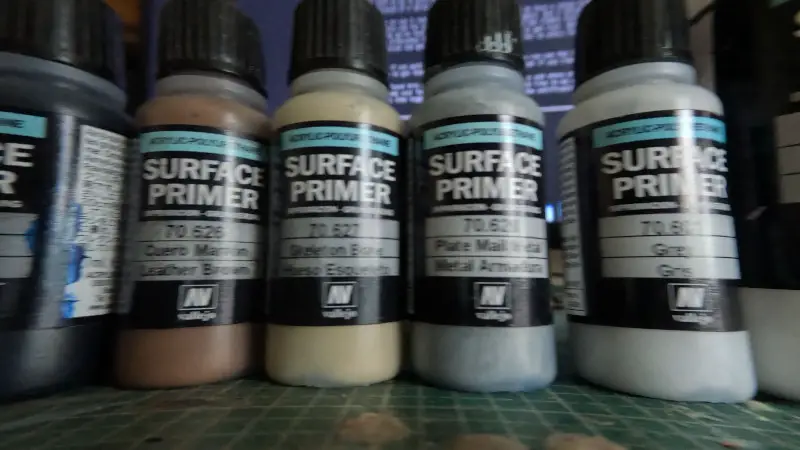
At this time I think Vallejo carry the widest array of coloured primers in this bottle format but it is still a bit short of what we might like. For example there is no primer in a caucasian skin tone, gold, purple or a bright yellow.
If this hack gets more popular then I hope a wider range of coloured primers may become available in bottles like this but for now Vallejo has the best range.
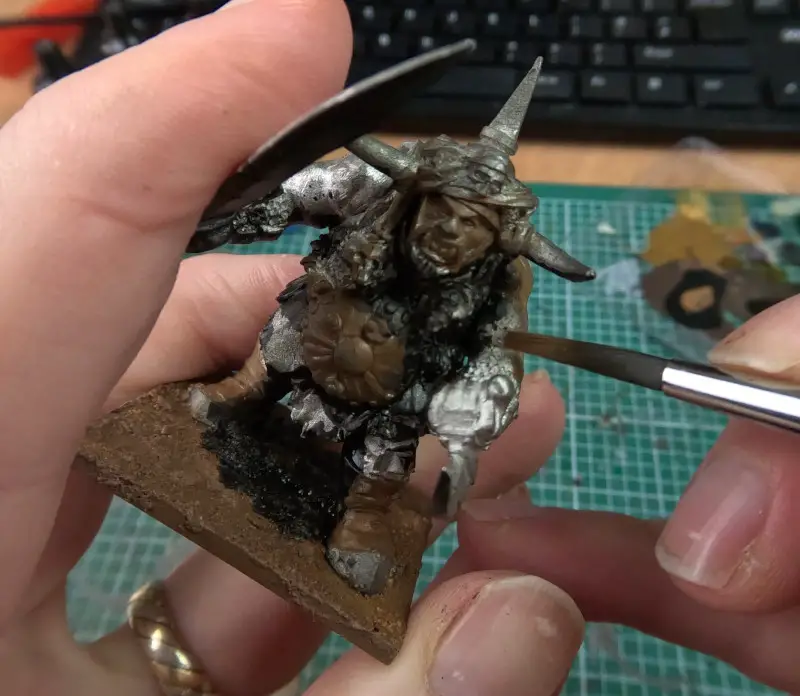
Okay so now that I have the macro shade primed in, now I will brush on the brown primer on everything that will be leather, skin and bronze. Later layers of regular paint will shift the hue away from brown but these will be all colours that are a fairly short shift from brown.
Remember we do not have a huge range of different colours to work with when using primers and I do not even have all of them that are available to me right now.
On the fly I have decided to make his skirt blue just to try out the blue primer. I also put down red primer on his trousers. I put down a metallic primer on parts that will be a steel or iron colour later.
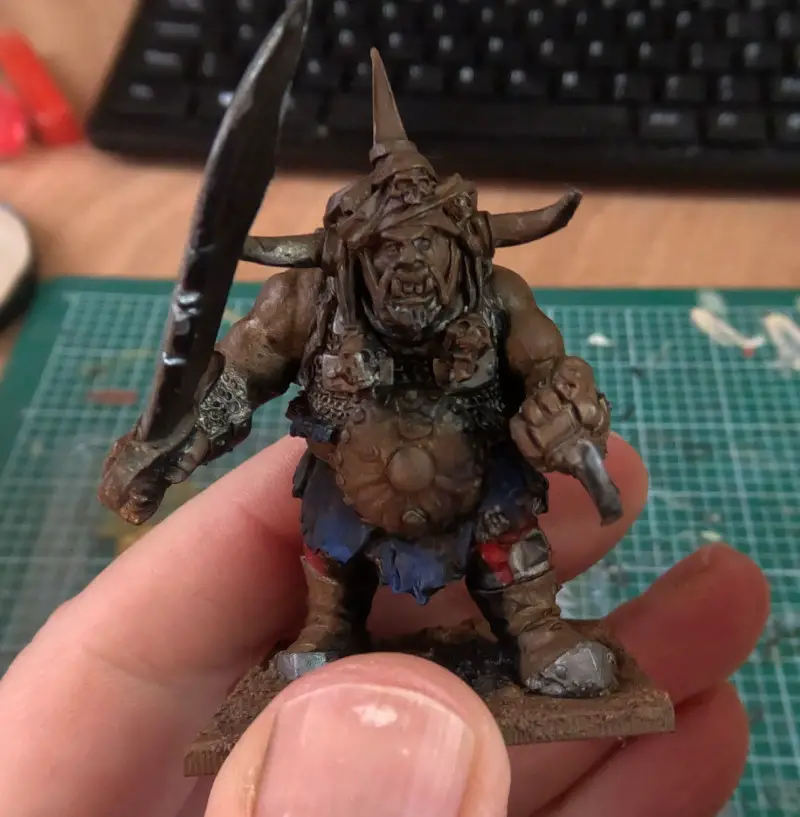
Now this chonky boi is fully primed and also simultaneously almost fully base-coated. From here we can switch to regular paints and use whichever techniques we like to bring him to completion. A wash all over, dry brushing or whatever you usually do.
The Pros and Cons of Base-Coating with Brushed On Coloured Primer
Advantages
- Saves time by folding priming into the base coating stage.
- Eliminates the need to mess around with spray cans and airbrushes.
- More subtly it lowers the motivational barrier to getting some paint down especially on single figures. We can just pick up a brush and go at it without planning for batches, keeping an eye on the weather or messing about with respirators and complicated cleaning rituals.
Disadvantages
- Primers are possibly harsher on brushes than regular paint. We might destroy brushes at a faster rate with this method.
- As yet only a limited range of colours available.
- Brushed on primer may take a little longer to dry and cure compared with the thin layers of an airbrush.
Finishing Off
As I used the brown primer as a basecoat for the leather, skin, bronze, skulls and turban so I will have to do a bit of hue shifting to move each section closer to how I want to finally look.
In hindsight I wonder if we could not get other colours for a auto-primed base coat by mixing a regular paint with a white or grey primer? That will have to be an experiment for another day, I did not think to try it with this model.
There we go we have brought him to a completely decent tabletop standard. The only thing left to do is give him a coat or two of varnish, which we could also do with a brush instead of a spray can or airbrush.
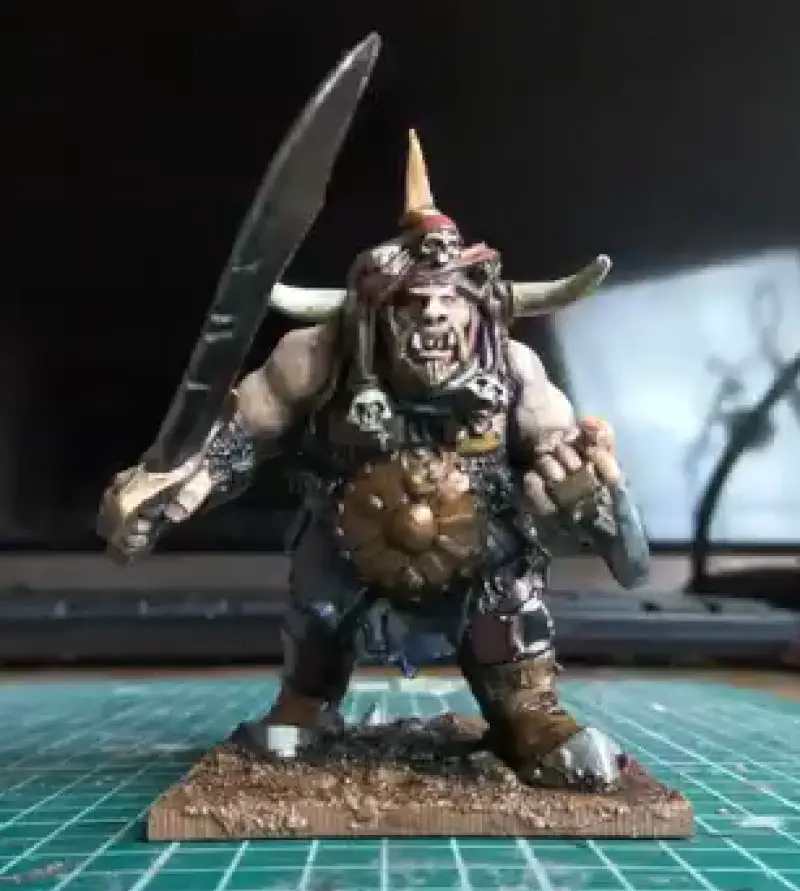
And I have to say I really like this way of priming. I do have a cheap airbrush which I normally only use for priming and doing zenithal highlights.
However I think the airbrush will no longer be my go-to tool for priming. Honestly I do find the fiddle factor of messing about with airbrushes to be a bit of a motivation hump to get over. Being able to just pick up a brush and get stuck in really lowers the barrier to entry for me and may for you too.
Trying it Out for Youself
Once again if you want to get these coloured primers you can use these links to get them at a nice discount.
- Vallejo Surface Primers stocked by Element Games.
- Vallejo Surface Primers stocked by Wayland Games.
- Vallejo Surface Primers stocked by Ebay.
Have a go, see if you like it.
I suppose this hack should have a snappy catchy name. Some ideas for what to call it that I have are: auto-priming, base-priming, sticky basecoating or all-brush painting.
Share this article to my twitter @SolarCrossGames or my reddit community r/SolarCrossGames and let’s chat about it.
This article is adapted from a video that I made for my youtube channel, see embed below.
Learn more about the wargaming hobby by clicking here.