Supreme Character Build Guide to 7 Days To Die
Introduction
In this article we will consider the various ways to create interesting and effective character builds in 7 Days to Die.
Developing a character’s abilities in 7 Days to Die is governed entirely by buying perks from the Character Skill Tree.
Perks are bought with skill points which are awarded when leveling up after accumulating a certain amount of experience points.
In the first section of this article we will examine the tactical utility of all the purchasable perks.
In the second section we will look at how we can combine various perks to create fun and interesting character builds to suit every playstyle.
Economic Builds
Warrior Builds
The Skill Tree Strategy Reference
The skills, or perks, of 7 Days to Die are divided among six groups: Perception, Strength, Fortitude, Agility, Intelligence and Books. The perks in the first five groups can be purchased with skill points earned from accumulating experience points. The last group of perks can only be gained from reading skill books found in loot or purchased from a trader.
In earlier versions of the game Perception, Strength, Fortitude, Agility and Intelligence were stats in themselves that granted appropriate bonuses to health, stamina etc when levelled up.
In Alpha 19 though they are now mainly meta perks which serve to control the unlocking of other perks. Since these meta perks cost skill points to buy the same as other perks, this makes reaching for the highest level perks more expensive than taking lower level perks.
This combined with the fact each successive level requires increasingly more experience points to achieve means that it makes sense to be particularly frugal about pursuing high level perks.
Perception Perks
Dead Eye – Rifles
Dead Eye increases damage, speeds reloading and reduces stamina use for rifle weapons. Unlocks rifle crafting. There are 5 levels and it needs Perception 10 to max.
Damage bonus for successive kills from level 3 onwards.
A good weapon for sniping single targets at a distance. Economical with ammunition compared with machine guns which use the same 7.62 mm ammo. A reasonable alternative to bows for hunting. The low rate of fire and small magazines of rifles makes them poor for dealing with hordes.
Demolitions Expert – Explosives
Demolition Expert increases damage, speeds reload and increases chances to stun and dismember. Unlocks crafting of a huge array of thrown explosives and land mines. There are 5 levels and it needs Perception 10 to max.
Also increases the efficiency of manufacturing gunpowder stacks at level 3.
The ability for explosives to do damage to multiple opponents makes them great for tackling hordes. Landmines are valuable for base defence. The only class of weapons that can cause serious self-harm, handle with care.
The lowest tiers of explosives, molotov cocktails and tin land mines, can be crafted without recipes or taking any levels here.
Javelin Master – Spears
Javelin Master increases damage and the throwing range of spears. Unlocks spear crafting though not needed for stone spears. There are 5 levels and it needs Perception 10 to max. There is no compelling reason to take it to level 5 though.
Uniquely spears can be used in melee and as a ranged weapon. The spear can be thrown and recovered for throwing again.
It is the one ranged weapon that does not consume ammunition which can save on crafting and harvesting.
Lock Picking
Lock Picking increases lockpicking speed and reduces chance of breaking lockpicks. There are 3 levels and it only needs Perception 7 to max.
Lockpick crafting is unlocked with level 1.
Handy for professional looters but there is not much reason to take it beyond level 1 unless you are very dedicated.
The Infiltrator
The Infiltrator will help you take less damage from landmines. Also traps and loose floor boards trigger slower allowing more time to escape. There are 3 levels and it only needs Perception 7 to max.
Level 3 allows you to pick up landmines.
Very useful for the persistent looter to avoid falling damage and losing control of a house clearance. Level 3 opens up new sources of landmines as you can now harvest them from the Places of Interest like army bases. It also allows the ability to re-position ones you laid yourself. This is useful for a nomadic lifestyle as you can lay your mines to defend a temporary night shelter then pick them up and take them with you to the next one.
Animal Tracker
Animal Tracker unlocks a special ability to have animals highlighted in your compass and field of view even if occluded when crouched in sneak mode. There are 3 levels and it only needs perception 7 to max.
The first level reveals only small animals like chickens, rabbits and snakes. Level 2 reveals larger prey like boars and deer as well as revealing middle weight threats like wolves and coyotes. Level 3 reveals formidable threats like bears and mountain lions.
Animal Tracker synergies excellently with the The Huntsman in the Fortitude tree. The utility for sourcing meat, bones and fat hardly needs to be stated but it also has some defensive value from level 2 onwards for those that travel much. Level 3 is of small value given that bears and lions are large and easy to spot unaided.
Penetrator
Allows your firearms, archery weapons and spears to ignore an increasing percentage of a target’s armor rating. There are 4 levels and Perception 8 is needed to max.
Level 2 onwards gives an additional ability to weapons in the rifle class allowing them to shoot through multiple targets and blocks of increasing hitpoints.
Not too many zombies have an armor rating, only the ones wearing helmets like the bikers, soldiers and demolisher zombies, so this of small utility for solo play. In PvP the armor reduction may have some value.
Penetrator is completely useless for those that specialise in melee or explosives though. However the extra abilities that Penetrator gives to rifle weapons from level 2 makes it a serious consideration for the rifle specialist. It opens up tactical opportunities to attack zombies before they batter down walls and doors. This makes rifles a little better when fighting indoors.
Lucky Looter
Lucky looter increases the speed of looting and serves up better spoils for it. There are 5 levels and you can have them all with Perception 7.
Lucky looter is of obvious value to the scavenger lifestyle. Largely makes redundant the need for crafting perks as you will find better quality tools and weapons than you can make. Often you will find recipes that unlock them along the way anyway. Consider combining with Better Barter to make profit from your valuable but unneeded finds.
Treasure Hunter
Treasure hunter helps speed up locating the buried supplies for the Buried Supplies quests given by the traders. It also increases the number of items found. Treasure Hunter has 3 levels and they call all be had for Perception 7.
Successive levels increase the yields and narrows the highlight after fewer blocks dug up.
Treasure Hunter synergies well with The Daring Adventurer in the Intelligence tree. Part of the utility of Treasure Hunter is having to do less digging to find the treasure but since digging itself yields sand and clay which is useful for crafting concrete this benefit is of small value to those big on base building.
Salvage Operations
Salvage Operations increases the speed and yield of harvesting with salvage tools like the wrench, ratchet and impact driver. It also increases the damage of the tools when used as a weapon. There are 5 levels and you only need Perception 7 to max them out.
It also unlocks wrench crafting from level 1.
Salvage tools are used to harvest various technological parts from cars, air conditioners and other machines. These technological parts are not really needed in quantity unless you are going deep down the Advanced Engineering and Grease Monkey perk lines in the Intelligence perk tree.
Strength Perks
Boomstick – Shotguns
Boomstick increases damage and increases reload speed for weapons in the shotgun class, which includes the entry level firearm the Blunderbuss. There are 5 levels and you need a Strength of 10 to max it out.
Double barrelled shotguns are unlocked with level 1. At level 5 leg shots will cripple targets.
The short range power of shotguns make them great for indoor fighting. Uniquely for firearms shotguns do not require brass in the crafting of their ammunition. They use paper, and for more advanced ammunition polymers, instead. The Blunderbuss is the only firearm you can build without a recipe and can be built without special gun parts.
Pummel Pete – Clubs and Bats
Pummel Pete doles out extra damage for clubs and bats. It also gives extra damage when hitting stunned targets and power attacks can knock targets down. There are 5 levels and you need a Strength of 10 to max it out.
Baseball bats are unlocked from level one. From level 3 onwards successive hits in rapid succession will give the last blow a 100% damage bonus.
The way to make the most of Pummel Pete is to get a power attack in early for the best chance of a knockdown then follow up with regular attacks on the head of the prone target for the bonus damage for hitting stunned opponents.
Given the use stamina cost of power attacks it is wise to combine with Sexual Tyrannosaurus which is also in the Strength tree and Flurry of Blows in the Agility tree.
Skull Crusher – Sledgehammers
Skull Crusher works a bit like Pummel Pete but for sledgehammers. Sledgehammers will do extra damage and power attacks can knock down opponents. There is no extra bonus for hitting the stunned though. There are 5 levels and a Strength of 10 is required to max it out.
Level 1 unlocks iron sledgehammer crafting. From level 3 onwards power attacks have a chance of knocking down nearby enemies as well.
The sledgehammer is a poorer weapon than its cousin the club but it is more versatile as it can be used to batter down walls and doors and even to harvest resources. This makes it a decent choice for the habitual looter as it can free up a number of inventory slots for loot. Skullcrusher’s ability to knock down nearby enemies can be a help when being mobbed during a breaking and entering.
Keeping up with the stamina cost of delivering power attacks suggests taking Skullcrusher with the Sexual Tyrannosaurus perk and other stamina aids. However unlike Pummel Pete the perk Flurry of Blows will not help.
Sexual Tyrannosaurus
Sexual Tyrannosaurus reduces the stamina cost for tool and melee weapons. It also reduces the stamina cost of power attacks. It has 4 levels and it takes a Strength of 7 to get them all.
From level 2 onwards delivering a killing blow will restore some stamina.
In combat Sexual Tyrannosaurus is a great engine for powering a melee focused build, being especially useful for those following Pummel Pete or the Skullcrusher lines. It is also useful for builders with a big appetite for the materials acquired though digging, mining and wood chopping.
Looter specialists and firearm specialists can safely ignore this line of perks.
Heavy Armor
The Heavy Armor perk reduces the stamina and mobility penalties associated with wearing armor items from the heavy armour class. It also increases the durability of this armor. It has 4 levels and a strength of 7 to max out.
Level 1 unlocks the crafting of iron armor.
It is important to be clear that the perk does not improve the protective value of the armor one wears as one might assume.
The value of the perk therefore depends a lot on how demanding on stamina your playstyle is. For example if you fight mainly with firearms, get around by motor vehicles and source materials mainly by scavenging and trading then it really is not doing much for you.
A scavenger who invests heavily in Lucky Looter may easily find better quality pieces of armor than one can make using the perk.
Investing in Armor perks will tend to push one into monopolising one kind of armor over another. However there is something to be said for wearing heavy armor when defending a base on horde night and light armor when resource harvesting.
The improvement in durability ultimately just saves you some repair kits and then only if you get hit a lot.
Pack Mule
Pack Mule opens up more slots in the inventory for being free of encumbrance penalties. It has 5 levels and they can all by had with a strength of 5.
Most useful for the looters among us but even then there are work arounds to encumbrance. Pocket mods also allow more items, though not by as much. Judicious scrapping can bundle many materials into one slot. For example radiators, doorknobs, and candlesticks all scrap down into brass.
Never forget that all vehicles have some storage capacity. Finally with a little wood one can build a storage box to serve as a cache to store the less useful items found. In the end smart inventory management can spare you from sinking skill points here.
Master Chef
The Master Chef increases the speed of cooking but mainly unlocks more cooking recipes with each level. It has 5 levels and unusually for a non-combat perk a strength of 10 is required to get them all.
If you live entirely off of hunting and scavenging tinned goods then there is not much point taking more than the first level. It is possible to find or buy the recipes without taking this perk. The first level is so useful to be almost mandatory but the investment of skill points needed to get to level 5 is so prohibitive that is not recommended unless one is already aiming for strength 10 to max out other perks. The Grandpa recipes unlocked at level 5 sometimes turn up in loot or in trader stores anyway.
Miner 69’ner
The Miner 69’ner perk increases the block damage of tools used to harvest stone, ores and wood such as shovels, axes, picks, augers and chainsaws. This has the effect of speeding up resource harvesting with these tools. It has 5 levels and all can be had by strength 7.
Iron tools are unlocked from level 1.
Scavengers and nomads can skip this but it is a must for the ambitious base builder. Tools appear in loot often enough and one only needs one of each. The increase to block damage matters more to those who dig a lot but not so much otherwise. Also good for frequent Treasure Hunters though, to find the treasure still quicker.
Pairs well with Motherlode. If you are not going deep down the Strength line but still want to maximise production then you could split skill points with Motherlode.
Motherlode
The Motherlode perk increases the resources harvested by the same set of tools as Miner 69’ner. Like Miner69’ner it also has 5 levels and can be maxed out at Strength 7.
In contrast to Miner69’ner it does not unlock any recipes.
The ambitious base builder will do well to take this alongside Miner69’ner to maximise production of building materials. While the net effect might seem the same as Miner69’ner, in that ultimately both deliver more resources for a given amount of time digging or chopping, motherlode does it without destroying as many blocks. This reduces the need for replanting trees and means mines will yield more in the long run before tapping out. If one does not wish to invest in both perks, then motherlode might just be a touch more useful in that respect.
Fortitude Perks
Brawler – Unarmed combat and knuckle dusters
The Brawler perk increases damage output for fist weapons like knuckle wraps and iron knuckles as well as bare handed attacks. Power attacks have the chance to stagger. As is standard for weapon perks it has 5 levels and a maximum fortitude is needed to get them all.
Level 1 unlocks the crafting of iron knuckles.
From level 2 onwards power attacks to the head have a chance to knock down the target.
At level 5 punches to the head have greater chance to explode.
Brawling weapons have a small range and low damage output but a small stamina cost also and fast attack speed. The Brawler perk emphasis hits to the head. If one has the finesse to deliver power attacks to the head, this may be a good specialism to take. Brawling requires one to get well within range of zombie attacks. It may be wise to level it alongside Pain Tolerance then.
Machine Gunner – AK47, M60 and Tactical Assault Rifle
The Machine Gunner perk increases the damage, rate of fire and reload speed for the machine guns such as the AK47, M60 and Tactical Assault Rifle, though not for SMGs which falls under the pistol category. The perk has 5 levels and a fortitude of 10 is required to max it out.
Level 1 unlocks the crafting of Ak47s. From level 3 onwards, hits will restore a small amount of stamina.
Machine guns are very effective weapons at all ranges but are hungry for ammunition. Also the 7.62 ammunition that they take in common with rifles is extremely costly in materials to craft requiring 3 times the amount of gunpowder as 9mm rounds. The high rate of fire can be deadly or an expensive folly if you miss. Keeping these beasts fed suggests taking this perk with Miner69’ner and Motherload to source the coal, nitrile and lead in sufficient quantities.
The perk’s bonus to stamina is odd and it would seem a bit weak. It could lend itself to a very mobile fighting style with lots of sprinting in between bursts of fire.
The Huntsman
The Huntsman is like Motherlode but for harvesting resources from animals. It increases the yield of resources from harvesting animal bodies. The perk has 5 levels and a Fortitude of 10 is needed to get them all.
It is probably not worth going deep down The Huntsman if one is not looking at hunting as the primary source of food or resources for trade. Animal remains are the primary source of bones needed for crafting glue though. Most tools, weapons and armor require duct tape made from glue to craft and maintaining them requires repair kits made from duct tape.
Well Insulated
The Well Insulated perk increases base resistance to heat and cold and reduces the food and water costs of being too hot or cold. It has 3 levels and all can by had with a Fortitude of 7.
At level 3 one becomes immune to the most severe stages of exposure.
Useful for those that roam around a lot from one biome to another and spend a lot of time outdoors. Not so useful for those with a more sedentary lifestyle especially if they stick to the temperate biome.
Living Off the Land
Living Off the Land increases the resources harvested from plants and reduces the cost of crafting farm plots. It has 3 levels and a Fortitude of 7 is needed to max.
Level 1 unlocks seed crafting for flowers. Level 2 unlocks seed crafting of vegetables and berries.
Since farming is the preferred food source for the sedentary lifestyle this perk is suggested for such. However it is necessary to get to level 2 to begin substantial food production this way.
Pain Tolerance
Pain Tolerance reduces the damage taken from being hit and reduces the chance of being stunned. It has 5 levels and a Fortitude of 10 is needed to get all the levels.
Level 5 grants immunity to being stunned.
Pain Tolerance is probably a must for dedicated melee fighters who will often be exposed to a beating. It is also useful for looters who are more at risk of being blindsided and surprised by enemies.
It may be a viable alternative to wearing armor.
The Healing Factor
The Healing Factor increases natural healing and speeds up the healing of critical injuries like sprains and breaks. It has 5 levels and a Fortitude of 10 is needed to max.
Like Pain Tolerance this perk is good choice for dedicated melee fighters. Since it reduces the dependence on healing items like bandages, asprin and food it is a fair alternative to taking The Physician. Effectively this frees up inventory slots which is always nice for the dedicated looter.
Iron Gut
Iron Gut reduces food and hydration loss from stamina use, reduces the chance of catching dysentery and makes buffs from consumables last longer. Weirdly, it also lengthens the time one go without breathing when underwater. It has 5 levels and a Fortitude of 10 is needed for them all.
Reduced dependence on food can be a useful alternative to going down The Huntsman or Living of the Land perks. A fair choice for nomads and scavengers as it reduces dependence on cooking for clean food and water.
Rule 1: Cardio
Rule 1: Cardio increases stamina regeneration from sprinting. It has 3 levels and a Fortitude of 7 is needed for all.
Good for foot sloggers when getting around. Also fair for melee fighters employing hit and run tactics. Spear throwers and knife fighters may find it suits. Shooters and motorists may find less use in it.
Agility Perks
Archery – Bows and Crossbows
Archery increases the damage output and speeds reload of bows and crossbows. It has 5 levels and an Agility of 10 is needed to max.
Level 1 unlocks the crafting of wooden bows and iron crossbows.
The benefit of archery weapons is the bonus to sneak damage and cheapness of their ammunition. For both these virtues they make for the most economical weapons for hunting. Often spent ammo can be recovered too. Also good for clearing out sleeping zombies and zombies out in the field. The low rate of fire makes it a poor choice for horde night.
Gunslinger – Pistols and SMGs
Gunslinger governs pistols such as the 9mm pistol, 44 Magnum and also the SMG. It has 5 levels and a Agility of 10 is needed to max.
Level 1 unlocks pistol crafting. From level 3 onwards a number of successive hits will double the damage of the last shot.
Pistols are a good general purpose firearm and if you are going deep down the archery and / or knife perk trees then pistols can make a reasonable weapon for emergencies and horde nights for which knives and bows have less utility. Pistol ammo is cheaper to craft than machine gun ammo requiring less gunpowder. It may occur more often in loot too.
Deep Cuts – Knives and Machetes
Deep Cuts makes knives do more damage and increases the number bleeding wounds you can inflict on a target. It has 5 levels and an Agility of 10 to get them all.
Level 1 unlocks crafting of the hunting knife. From level 3 onwards bleeding wounds slow the target down too and glancing blows can also cause bleeding.
Knives like sledgehammers are dual use tools and weapons. As a tool they can harvest animal carcasses. This makes them good for saving an inventory slot particularly for those that specialise in hunting for food and resources. As a weapon the bleeding damage they deal suggests using hit and run tactics particularly with multiple opponents. Use your stamina for sprinting away to another target rather than power attacks.
Synergies well with Flurry of Blows and Cardio for those using hit and run tactics.
Knife attacks get a bonus to damage for sneak attacks so consider combining with From the Shadows and Hidden Strike.
Run and Gun
The Run and Gun perk improves hip fire accuracy and reduces the movement penalty while reloading. It has 3 levels and an Agility of 7 to max.
At level 3 the movement penalty for reloading is completely removed.
Best for complementing short ranged firearms with small magazines, like pistols and shotguns.
Flurry of Blows
Flurry of Blows increases the attack speed for all melee weapons except the sledgehammer and spear. It has 3 levels and an Agility of 7 is needed for all of them.
At level 3 each kill restores stamina.
A good choice for most melee fighters, especially knife fighters since it is in the same Agility tree. The restoration of stamina for kills at level 3 can make the judicious use of power attacks virtually free of stamina cost.
Light Armor
The Light Armor perk reduces the stamina and mobility penalties associated with wearing armor items from the light armour class. It also increases the durability of this armor. It has 4 levels and a strength of 7 to max out.
Level 1 unlocks the crafting of leather armor.
It is important to be clear that the perk does not improve the protective value of the armor one wears as one might assume.
The value of the perk therefore depends a lot on how demanding on stamina one’s playstyle is. For example if you fight mainly with firearms, get around by motor vehicles and source materials mainly by scav0enging and trading then it really is not doing much for you.
A scavenger who invests heavily in Lucky Looter may easily find better quality pieces of armor than one can make using the perk.
Investing in Armor perks will tend to push one into monopolising one kind of armor over another. However there is something to be said for wearing heavy armor when defending a base on horde night and light armor when resource harvesting.
The improvement in durability ultimately just saves you some repair kits and then only if you get hit a lot.
Parkour
Parkour increases the safe fall distance and the stamina cost of jumping. It has 4 levels and an Agility of 8 is needed to get them all.
At level 2 and 4 jump height is increased. Level 3 grants immunity to broken legs from falling. Level 4 grants immunity to sprains from falling too.
Parkour has great utility for looters particularly in the taller structures. Reducing the need for wood scaffold for moving up and down can speed up house clearances and offer more opportunities escape mobs. Where Infiltrator can help avoid falling traps Parkour helps keep you mobile if do get caught out. Parkour can save an inventory slot by removing the need to carry splints.
Hidden Strike
Hidden Strike increases the damage bonus from sneak attacks. It has level 5 and an Agility of 10 is required for them all.
In common with all stealth perks and buffs it is useless for horde night. However it has utility for hunting and general zombie clearances. Any weapon can get a sneak damage bonus but bows and knives get extra sneak bonuses. A bow or knife specialist will want to maximise the use of sneak attacks so hidden strike is a natural complement. The perk also synergies well with From the Shadows.
From the Shadows
From the Shadows makes it harder to detect in the dark, reduces the noise from actions and reduces the speed penalty for sneaking.
In common with other stealth related perks and buffs From the Shadows is useless for surviving horde night. It will help in hunting and general zombie clearances. Moreover it makes hiking and hunting at night considerably safer.
Intelligence Perks
Electrocutioner – Stun Batons
Electrocutioner increases the damage and stun duration of stun batons. It has 5 levels and an Intelligence of 10 is needed to get them all.
Level 1 unlocks stun baton crafting.
The stun baton is an okay melee weapon. Although the damage output is low but the stunning effect has its uses. Potentially evil if combined with Pummel Pete and clubs. Use the baton to stun then switch to club to brain them while they are down.
Robotics Inventor
Robotics Inventor makes robot weapons do more damage and have a faster rate of fire. The distance from the player for which the robot will be active is also increased.
Level 1 unlocks the crafting of the robotic sledge and level 5 allows two robots to be active at one time.
Robots are like base turrets you can take on the go. Since they are still static when deployed they are best set up at a retreat point. Go in to find the zombies then lure them back for a robotic ambush.
Better Barter
Better Barter reduces the sale price of a Trader’s wares and increases the price of items sold to the trader. It has 5 levels and an intelligence of 10 is needed to get them all.
Level 3 and above puts better loot into the Trader’s secret stash.
Better Barter has utility for anyone using traders heavily to transmute specialised production into a variety of needs through trade.
The Daring Adventurer
The Daring Adventurer adds extra choices for quest rewards and an increase in the reward in dukes. It has 4 levels and an Intelligence of 8 is needed for them all.
Synergies well with a career as a scavenger since most quests involve clearing out places of interest. Also goes well with Treasure Hunter. Better Barter can make your Duke earnings go further too.
Killing zombies on its own is not very profitable except for XP farming so trader quests boosted by Daring Adventurer can make pure warrior builds more economically viable.
Charismatic Nature
Charismatic Nature awards various buffs to nearby allies. It has 4 levels and an Intelligence of 7 is needed for them all.
Entirely useless for solo play. May have use for cooperative play.
Physician
The Physician perk restores more health using healing items and more XP for using them. It has 4 levels and an Intelligence of 9 is needed for them all.
Level 1 unlocks the crafting of chemistry stations, first aid bandages and plaster casts. Level 2 makes chemistry stations craft faster. Level 3 unlocks the crafting of first aid kits and steriods. Level 4 unlocks Anti-biotics, Fortbites and Recog.
Advanced Engineering
Advanced Engineering unlocks many crafting recipes and reduces the production cost of some key materials. It has 5 levels and requires an Intelligence of 10 to max out.
Level 1 unlocks forges. Level 2 unlocks workbenchs and cement mixers. Level 3 unlocks military fibre, generators and many advanced traps. Level 4 unlocks nail guns, shotgun turrets and battery banks. Level 5 unlocks SMG turrets and crucibles.
It is tempting to consider that at the least the lower levels of Advanced Engineering are mandatory in order to unlock forges, workbenches and cement mixers. However working forges, workbenches and cement mixers do exist out in the world, recipes to make them exist in loot and finally they can sometimes be bought at traders. Certain play styles could well skip this line of perks entirely. Most play styles should at least take the first though.
The ambitious base builder might well find value in going deep here in order to access the full range of base defences.
Grease Monkey
Grease Monkey reduces the cost of crafting vehicle parts and unlocks the crafting of those parts. It has 5 levels and an intelligence of 10 is needed for all levels.
Level 1 unlocks bicycle parts. Level 2 unlocks mini bike parts. Level 3 unlocks motorcycle parts. Level 4 unlocks 4×4 truck parts and level 5 unlocks gyro-copter parts.
As much as vehicles are useful for getting around one only really needs the use of one. Parts and recipes for parts can be found in loot and at traders. Sometimes complete vehicles can be bought at traders. Grease Monkey is not absolutely necessary in order to obtain a vehicle.
Example Character Builds
After the first rather unspecialised build, Jack Of All Trades, presented below we will present a number of very specialised builds for your consideration. They can be played as presented but can also be combined with other specialist builds to create hybrid builds for a more well rounded if less specialised build.
Jack of All Trades, Master of None
The classic beginners build. The Jack of All Trades will aim to get some basic proficiency in a variety of skills to cover all needs. It is a points efficient build in the sense that the 7 Days to Die skill tree is particularly expensive to those who specialise heavily.
Key Perks
Any cheap perk at level 1 or 2 will do especially the ones that unlock key recipes at low levels: Salvage Operations, Master Chef, one of the armor perks, Miner69’ner, Living off the Land, Physician, Advanced Engineering and Grease Monkey. Most weapons will be tried before settling down on specialising in two or three of the most preferred.
Key Stats
None to start with. Once some weapons are preferred over others then the associated stats will become important to level up.
Notes
Jack hunts, he farms, he mines, he loots, he crafts and he fights. He does it all even if he does not do any so very well. This does make him quite self-sufficient though. Consequently he has little use for the trader but for doing the occasional quest and blowing spare cash.
Economic Specialist Builds
The following section covers a number of builds that specialise in the production of a limited number of goods. Surplus production is then traded for all the other items needed for survival at a trader.
Hunter
The hunter specialises in harvesting leather, fat, bones and meat from the animals he hunts. Besides covering him for food, the surplus leather, fat and bones can be crafted into knuckle wraps, candles and duct tape for sale to a trader or sold as is.
Key Perks
Animal Tracker to Level 2, optionally to level 3, will greatly help finding prey. The Huntsman can be taken all the way to level 5, as it increases the yield from hunting. Master Chef at level 1 is sufficient to unlock basic meat recipes. Light Armor is suggested to at least level 1 to open up leather armor crafting.
The key tools for a hunter are a hunting knife and suitable weapon for killing the animal. Thus Deep Cuts to at least level 1 is suggested for knives. Bows make the ideal hunting weapon so Archery is wanted.
Most animals will either run away or attack if the hunter is detected. So it is best to sneak up and attack from some range. The sneak bonus that bows have and their decent range makes them particularly useful for this. Additionally they are economic for hunting because their ammunition is so cheap and often reusable.
To assist in sneaking both Hidden Strike and From the Shadows are suggested to as high a level as one wants. The extra damage from Hidden Strike can raise the potential for one shotting even the larger and more dangerous animals.
Spending a lot of time outdoors and potentially roaming different biomes makes Insulated of potential interest.
For those times when one is discovered Rule 1: Cardio can one help make a clean get away.
Key Stats
Per 3, Str 1, Fort 10, Agi 10, Int 1-10
Animal Tracker is vital for this build but only a Perception of 3 is needed for the most important levels.
Going all the way on The Huntsman means going for a Fortitude of 10. If one is going to Fortitude 10 then one could also look at maxing out Insulated and Rule 1: Cardio.
Maxing out Archery and Deep Cuts will require Agility 10. If one is going to 10 in Agility then one may also max out Light Armor, Hidden Strike and From the Shadows.
Spare points can be put into Better Barter for a better deal on one’s produce.
Weapons / Armour
Naturally bows and knives are the basic weapons (and tools) of this build. However one must still survive horde night and neither weapons do well in that situation. Since Perception 3 opens up Demolitions Expert a bit, consider pipe bombs and landmines for horde night. Otherwise Agility 10 does open up the whole pistol tree too, which is a fair weapon for dealing with the hordes.
Light armor will do less to mess with your mobility and stealthiness than heavy armor. Also the professional hunter will have no shortage of leather and duct tape needed for manufacture.
Hybrid Potential
The Hunter’s skill set and gear overlaps a lot with the Ninja build. Alternatively get primitive with the Savage Build.
Notes
The Hunter will spend most of the week on the move, day and night, hunting and hunting. He will have numerous very basic bases composed of a campfire and a storage box scattered all over the map. To make best use of the campfire he will carry with him a cooking pot and grill. For most of the week his stealth is his shield.
His weakness is horde night. To save himself he will find a suitable building somewhere centrally to convert into a fort with materials bought from the traders in return for leathers, glue, candles and meat.
Scavenger
Why work to produce when the dead world left all you could need free for the taking? The scavenger does not dig, nor chop, hunt or farm instead he rummages through the broken ruins of the old world for the lost trash and treasures. Unwanted items are fenced off at the trader.
Unlike other economic specialists the scavenger can potentially find the full range of needed items from his work. Only building materials may be in short supply without hitting up a trader.
On the other hand the dedicated scavenger will do better than any other build for sourcing skill books. The recipes discovered largely obviates the need to take the crafting perks.
Key Perks
Lucky Looter is the key perk here, take it all the way to level 5. Lockpicking will have some use to speed up house clearances. Infiltrator will keep you safe investigating ruins. Salvage Operations can help you squeeze a little more loot from the locations you visit.
Because looting can fill up your inventory fast Pack Mule might be worth a few points. Parkour has utility for avoiding fall damage, for moving around ruins faster than using wood scaffolding and escaping sticky situations by jumping out the window.
As noted above, the Scavenger has little use for perks that unlock recipes since he will tend to find an abundance of recipe books in the course of looting. Moreover the Scavenger has less need for crafting anyway.
Daring Adventurer is good because most quests involve invading loot rich sites so one may as well combine the two for maximum rewards.
Finally serial looting puts one continually in combat situations. Serious fighting skills are suggested. The looter will tend to engage indoors suggesting short range but powerful weapons are to be preferred: melee weapons, shotguns and pistols. In combination decent healing or resilience perks like physician and pain tolerance are useful. Insulated can help with looting diverse biomes.
Key Stats
Per 10, Str 1-10, Fort 1-10 , Agi 1-8 , Int 1-8
Maxing Lucky Looter will require a Perception of 10. By taking Perception to 10 one could just as well max out Infiltrator and Salvage Operations too. Of the Perception weapons only Demolitions Expert really stands out as potentially desirable, although using explosives indoors is even more risky than usual. One still has to survive horde nights though and explosives are great for that.
Strength does not have much too much to offer the looter besides Pack Mule unless one wants the weapons perks there. Shotguns, clubs and sledgehammers are all good for the house breaker. If one goes for the weapons here then one may as well take all of Pack Mule and possibly go down the Heavy Armor line. There is no great need to take any armour perks though. Lucky Looter will find you better pieces of armor than you can make and the other benefits are marginal.
Fortitude has nothing much for the looter but for Pain Tolerance which can keep you alive when things get ugly, as they often will. One could go deep down Fortitude if one’s weapon of choice were machines guns though.
Agility has Parkour, which is useful here but that can be maxed at Agility 8. If one goes with a melee specialism, besides sledgehammers and spear chucking, then Flurry of Blows can help with the fight. Going with pistols could provide a reason to take Agility to 10.
Intelligence has The Daring Adventurer for the scavenger’s advantage but that can be maxed at Intelligence 8. A few levels in Physician and Better Barter is a fair call.
There are a lot of ways to build a scavenger but one should resist the temptation to aim to take it all. Besides taking Perception to 10 for Lucky Looter one should plan on taking no more than one other stat to 10. That stat should govern one’s main weapon of choice.
Weapons / Armor / Tools
Mix and match armor as one finds it but always wear as much as one can. Sledgehammers will save you an inventory slot since you can use it for breaking in. Shotguns are strong in close quarters. Tools beside the sledgehammer are the wrench and lockpicks. Also a vehicle is quite desirable.
Hybrid Potential
The Scavenger Build combines well with The Adventurer build. Going heavy down Salvage Operations will provide plenty of material for The Inventor Industrialist.
Notes
Once looted a container will not refresh its contents for 30 days excepting containers in quest sites. This leads the pure Scavenger into a nomadic existence much like the Hunter, continually moving into new areas for fresh loot.
However the Scavenger has less use for campfires since serial looting will usually turn up sufficient canned goods and water for consumption. The looter will have a great need for storage though given the diversity of goods he will find. The looter should cultivate a network of caches across the map for storing his finds. Naturally as with most any build at least one base must be built as a fort to hold off the horde.
Farmer
Why run around after animals when plants stay where they are put? The farmer builds up a vast plantation of plantable crops like corn and potato. The aim is not just to produced enough food to eat but to produce a huge surplus to trade for other goods.
Key Perks
The crucial perk for the Farmer is of course Living off the Land which should be maxed out early. This unlocks seed crafting, makes farm plots cheaper and increases the harvest. The other is Master Chef but one hardly needs any levels beyond 2. That is it for key perks, the Farmer is one of the cheapest builds. However given the sedentary lifestyle of the homesteader it makes senses to also invest somewhat in skills related to base building. One can afford to put a few points into Miner69’ner if only to unlock the iron tools. At least one will want a shovel for harvesting clay for farm plots.
Putting points into Better Barter makes sense too, to haggle a better price for your crops.
If one sells food cooked from one’s crops like baked potatos and cornbread then it will be important to source jars in quantity since they are consumed in the production of these recipes. A point in Advanced Engineering will unlock the forge which when fed with sand and clay from your digging will give an endless supply of jars.
One could also diversify into producing simple meds by cultivating aloe vera and cotton and putting a point into Physician for First Aid Bandages.
Since the farmer will spend most of his time safe in his compound there is no great need for extensive fighting skills. However the horde will still find him on horde night so an investment in perks for base defences like Demolition Expert and Advanced Engineering may be well advised.
Key Stats
Per 1-10, Str 3, Fort 5, Agi 1, Int 1-10
Only a Fortitude of 5 is needed to max out Living off the Land and you can get all the crucial cooking recipes with only 2 levels in Master Chef for a Strength of 3. For a better price on your wares you can take all the levels in Better Barter for an Intelligence of 10 but this optional. Pursuing Demolition Expert and Advanced Engineering to high levels for base defence could suggest taking Perception to 10 as well as Intelligence.
Weapons / Armor / Tools
You will be mostly be fighting zombies on your home turf so Demolitions Expert is suggested for access to landmines. If going deep on Intelligence for Better Barter and Advanced Engineering then Stun Batons and Robots are suggested. Rifles may be a choice for picking off trespassers on your extensive estates. Otherwise there is free choice.
Armor is not so important to the farmer but heavy could be preferred over light.
Main tools: shovel, axe, hammer, bone knife (for harvesting rotten flesh to make farm plots).
Hybrid Potential
The low skill points required for the professional Farmer makes it easy to blend with a number of other builds. It does go particularly well with Miner / Lumberjack and Castellan due to the sedentary lifestyle. Many crops can be processed into medicines meaning the Chemist build is an easy side hustle for the Farmer.
Notes
It only takes one seed per plant type to begin growing a large stock. Simply craft new seeds from the produce. However the more seeds one starts with the faster it is to build up a large stock. Seeds, or crops from which seeds can be crafted, can often be sourced from traders.
Besides seeds one resource of critical importance is rotten flesh needed to craft farm plots. I have never seen this for sale at a trader so it will probably need to be harvested from zombie animals or the various corpses and body bags scattered around. This also yields some nitrile which is also needed for farm plots.
A good site for a farmstead would be near water, on a flat plain and ideally also near a trader. It is not apparent that biomes make any difference to the productivity of farms. Most crops need access to light, the exception being mushrooms. Mushrooms also do not need a farmplot.
Miner / Lumberjack
The same perks boost both mining and tree cutting, so to be good at one is to be good at the other.
The Miner / Lumberjack sleeps all night and works all day and he is okay even when wearing panties and a bra.
Oh wait this is not Monty Python. The Miner / Lumberjack specialises in digging and chopping and selling the raw materials to the trader for his other needs: food, weapons, panties and bras.
Optionally with a few points sunk into Advanced Engineering, or access to forges and cement mixers by other means, the Miner can add value with some additional processing. Alternatively the proud owner of a coal and a nitrile mine can manufacture gunpowder without any work stations although a chemistry station helps for efficiency.
Key Perks
The engine of this build is Miner 69’ner and Motherlode taken together. Take them both to level 5 for maximum productivity. Take Sexual Tyrannosaurus for the reduced stamina usage using tools.
To supplement these consider that Advanced Engineering to level 2 can give you access to forges and cement mixers and Chemistry to level 1 gives access to Chemistry Stations for the gunpowder merchant.
The gunpowder merchant might also look at sinking some points into Demolition Expert for the boost to gunpowder manufacturing at level 3. Better Barter, as ever, has use for the production specialist.
Key Stats
Per 1-5, Str 7, Fort 1, Agi 1, Int 1-10
Weapons / Armor / Tools
A heavy investment in strength naturally points to clubs and shotguns for self-defence. Access to vast quantities of gunpowder would make a Miner a mean mad bomber.
The Miner can wear any armor but should consider not wearing any when working to avoid tiring. Save the suit for horde night and trips to the trader. Tools: all of them.. or at least pick, shovel, hammer and axe.
Hybrid Potential
No one can generate building materials in greater quantities than the Miner / Lumberjack so combine with a Castellan for the biggest forts. The Miner can buy his food from a trader but for more self-sufficiency combine with a Farmer.
Notes
The miner is a natural base builder.
Inventor Industrialist
It is said one man’s trash is another one’s treasure but the Inventor Industrialist is the man to turn trash into treasure.
The idea here is that manufactured goods are worth more than the sum of their parts and in the difference lies potential profit.
For example buy forged iron and electrical parts, turn them into electric fence posts, relays and light bulbs and sell them back for a profit. He could even sell completed vehicles.
This buy-build-resell process is untested by me at this time though. The potential sticking point is that with the trader’s brutal premiums it may be that not enough added value can be created through manufacturing to actually yield a profit. A more reliable variant would be to combine manufacturing with scavenging to source the inputs instead of buying them.
Key Perks
Advanced Engineering, Grease Monkey and Better Barter. Max them all. Both Advanced Engineering and Grease Monkey reduce the cost of crafting many wares that we will be selling, as well as unlock their recipes. By buying our inputs as well as selling our outputs we get hit by the trader’s premiums twice over, so every point put into Better Barter is doubly valuable.
Going heavy down Intelligence suggests Electocutioner and Robotics Expert for personal defence.
Key Stats
Per 1, Str 1, Fort 1, Agi 1, Int 10
Hybrid Potential
As already hinted the Inventor Industrialist combines well with a Salvage Operations empowered Scavenger in order to efficiently source parts. Given that many of the gadgets he can create are for base defences an Inventor Industrialist is a natural side hustle for a Castellan. Easily combined with Chemist.
Weapons, Armor, Tools
Weapons: stun batons, robots, base defences. Armor: any. Tools: Workbench, hammer. One important use of the workbench is to create extra crafting channels to allow production in parallel.
Notes
Of all the economic builds and most warrior builds the Inventor Industrialist should have the least to worry about on horde night.
Chemist
Like the Industrialist the Chemist attempts to extract a profit through the processing of base materials into more manufactured goods for resale. Unlike the Industrialist the Chemist’s tools of choice are the campfire and chemistry station.
Key Perks
The Physician perk is a bit optional, it does nothing much for the profitability of crafting but it does unlock some key recipes including for the creation of a chemistry station.
Those recipes potentially can be sourced by other means though. Master Chef is similarly optional. For Chemists specialising in gunpowder manufacture then Demolition Expert at level 3 is useful. Whatever the goods produced Better Barter is always helpful for getting a bigger profit.
Key Stats
Per 5, Str 1-10, Fort 1, Agi 1, Int 10
Weapons, Armor, Tools
Weapons: Demolition Expert suggests explosives and Better Barter suggests stun batons and robots. Otherwise it does not matter. Armor: any. Tools: campfire with cooking pot and beaker, chemistry station.
Hybrid Potential
The potential for combining with other builds depends on the produce. Gunpowder manufacture pairs well with the Miner since miners are good at supplying the raw materials for gunpowder. Medicines manufacture combines well with the Farmer since many of the substantive ingredients are cultivatable flowers and crops. For example: grain alcohol is made from corn meal, first aid bandages are made from cloth (cotton) and aloe vera, beer can be made from hop flowers.
Notes
Other potentially profitable products are: oil from shale, gas from shale, paint from Chrysanthemum flower and oil, herbal anti-biotics from nitrate powder, blueberries, mushrooms, Chrysanthemums and murky water.
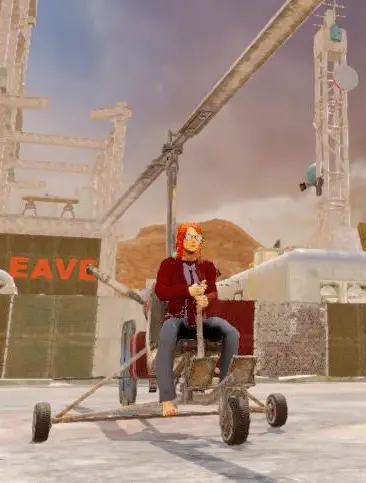
Adventurer
The Adventurer is the dedicated treasure hunter. His bread and butter is completing quests given by traders. Unlike the warrior builds below he prefers to take on the quests for retrieving supplies, buried or hidden, without getting into a fight. Avarice is his vice, not aggression.
Key Perks
Naturally this build is driven by Treasure Hunter for efficient digs and The Daring Adventurer for better quest rewards. The Infiltrator, Cardio, Parkour and From the Shadows can all help stay out of trouble. Lockpicking is useful for more and better loot, as is Lucky Looter. Pack Mule can help with carrying it away.
Key Stats
Per 7, Str 5, Fort 7, Agi 10, Int 8
Weapons, Armor, Tools
Weapons: Sledgehammer and perhaps a pistol. Armor: light. Tools: shovel for digging up treasure, Sledgehammer for breaking and entering, lock picks for.. well, you know what they are for.
Notes
The Adventurer is really a more specialised and pacific variant of the Scavenger so that represents a natural hybrid. A more aggressive, and therefore more well-rounded, Adventurer can be made by combining with one of the warrior builds below. The Ninja and Commando are good ways to give the Adventurer some teeth.
Warrior Builds
The following builds are focused on success in combat. In general killing zombies is not very profitable in itself, as they yield no harvest and rarely drop loot. Usually then a warrior build needs be combined with one of more economic builds because a fighter still needs food, ammo and shelter. However 7 Days to Die does offer one way to cut a paycheck from pure combat, the Clear Zombies quest from a trader. Most of the following builds rely on serial abuse of this quest for their economic support.
Ninja
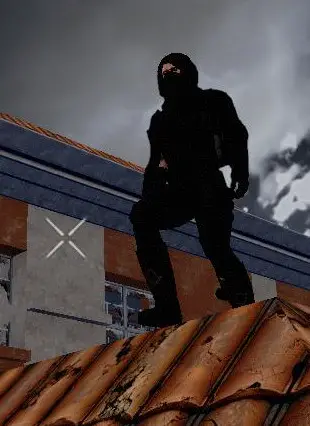
The ninja is the pre-eminent stealth fighter. Zombies will die (again) without even knowing it.
Key Perks
The key perks here are Hidden Strike and From the Shadows for increased stealth and damage to sneak attacks. Bows and knives are the stealthiest weapons so maxing out Archery and Deep Cuts is appropriate. Even the stealthiest ninja can not get the drop on every target so to cover a hasty retreat when discovered the ninja can stun his pursuers with a flashbang. Demolition Expert to level 2 will give explosive weapons like pipebombs a 100% chance to stun.
Sneaking into enemy grounds runs the risk of falling a foul of traps so take The Infiltrator. Even light armor works against stealth and mobility so the Light Armor perk can mitigate that. Otherwise seriously consider not using anything heavier than Padded Armor instead; this will help make the ninja quicker and stealthier. Padded Armor has no mobility penalties. Note the Light Armor perk does not do much for Padded Armor so consider it optional. Ninjas do not tank hits like a dummy, they avoid being hit in the first place. Invest in Cardio and Parkour for a quick get away.
The pure ninja will earn his keep running assassination ops (Clear Zombies quest) for the traders. Take The Daring Adventurer for better pay.
Key Stats
Per 7, Str 1, Fort 7, Agi 10, Int 1-8
Weapons, Armor and Tools
Bows, knives and grenades. Padded Armor. Possibly a shovel and axe to build fall traps for horde night. An axe or sledgehammer can be handy for breaking into some places of interest.
Hybrid Potential
The ninja’s skill set overlaps a lot with the Hunter. Hunt by day, ninja by night.
Notes
All fighters that rely on stealth are disadvantaged on horde night so this is true for the ninja too. However the ninja can run if he cannot hide. Also with Demolition Expert and Infiltrator he can run his frenzied pursuers through a deadly gauntlet of traps and landmines.
Savage
Technology is over rated. The Savage’s armor is his abs of steel. His weapon is his vigorous physique. His wealth is his self-sufficiency. His mighty fortress is a fast pair of feet.
Key Perks
Pain Tolerance, Healing Factor, Iron Gut and Rule 1: Cardio taken to the max. Supplement with Parkour, Insulated and Sexual Tyrannosaurus. Pain Tolerance delivers damage resistance without amour. Healing Factor delivers healing without meds. Iron Gut and Insulated reduces the dependence on food and water. Parkour and Cardio helps get around without wheels, escape fights and play hit and run without elaborate bases.
Consider playing the savage as a pure spear specialist. Carry many disposable stone spears for throwing. Play a running fight, throwing and picking up to throw again. To this end get Javelin Master.
Key Stats
Per 10, Str 1-7, Fort 10, Agi 1-8, Int 1
Pain Tolerance, Iron Gut and Healing Factor require a Fortitude of 10 to max out. Take Perception to 10 for proficiency in spear chucking. Strength can be ignored unless you want to get Sexual Tyrannosaurus but one only needs a Strength of 7 to max that. Agility has Parkour but also Archery and Deep Cuts if you take those weapons. Intelligence has nothing suitable here.
Weapons, Armor and Tools
Spears for hunting and fighting, a bone knife for meat harvesting. Armor heavier than padded armor is to be avoided for the stamina penalty and maintenance costs. Let Pain Tolerance, Healing Factor and Cardio keep you out of trouble instead.
Hybrid Potential
Naturally combines well with the Hunter. A savage still needs to eat even with the advantage of Iron Gut and Insulated. He is going deep down Fortitude so he could pick up levels in the Huntsman too for bigger yields. He can pick up a level or two in Animal Tracker while developing Spears skills in the Perception Tree. Perhaps it is even possible to hunt by spear throwing instead of with bows.
Notes
The Savage, for having few material requirements, has not much use for traders or bases. Although it might be worth running some quests to earn some dukes to buy food if he does not hunt or to buy better spears than he can craft.
Horde night is a challenge without base building skills and resources but no one can run faster and for longer than the Savage. Approach horde night as less a Battle of Rorke’s Drift and more a Running Man marathon of doom.
Castellan
The Castellan is the master of fortifications. Stout walls are his shield, brutal traps are his weapons. Unlike most warrior builds the Castellan is not optimised for quests, although he can still do them, so he needs to be supported by more civilian trades. Moreover his material needs are larger than most. In this way the Castellan is best combined with an economic build, particularly sedentary ones which specialise in producing key building materials for forts.
Key Perks
Advanced Engineering and Demolition Expert are the key perks to be maxed out for access to the full range of deadly defences. Robotics Expert is handy for an extra turret that can be rapidly redeployed to shore up battered defences. Going down Perception makes the rifles buffed by Dead Eye an efficient choice for a supplementary weapon.
The Castellan has no great need for mobility, he lets the enemy come to him, consequently the Heavy Armor perk is a fair choice though unnecessary. For when all else fails a close up weapon is useful, so Boomstick or Pummel Pete are a consideration for better shotguns and clubs.
Key Stats
Per 10, Str 1-10, Fort 1, Agi 1, Int 10
Weapons, Armor, Tools
Weapons: base defences, grenades, landmines, rocket launchers, rifles, shotguns, clubs and robots. Armor: heavy. Tools: hammer, wire tool.
Hybrid Potential
The Castellan’s skill at defending static resources, like mines and farms, and his enormous hunger for resources like building materials, gadgets and gunpowder both suggests pairing with the Miner, Farmer and / or Industrialist builds.
Notes
As noted earlier hardly any build is as hungry for resources as the Castellan. However, if sufficiently supplied, the Castellan is the peerless survivor on horde night.
Commando
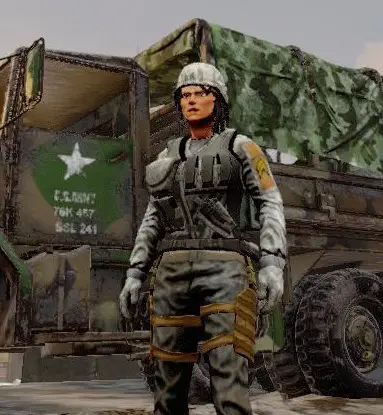
The Commando is the professional firearm specialist, well versed in modern warfare. Ten-hut! Semper fi, do or die.
Key Perks
Maxing Machine Gunner and Demolition Expert trains the commando is his weapons of choice: machine guns and grenades. Pistols make a fair back up weapon in case of running out of ammo for the machine gun, so drill in Gunslinger also.
The Infiltrator schools him in avoiding booby traps on mission.
The commando’s range of optimal engagement is the middle distance. At long range his furious rate of fire can result in wasting ammunition. Eschewing melee weapons puts him at a disadvantage at short range, he risks being taken down. Thus controlling the distance is critical. To this end the Cardio, Run and Gun and Light Armour perks help have the speed and stamina ready for tactical redeployment.
Take The Daring Adventurer for better mission rewards.
Key Stats
Per 10, Str 1, Fort 10, Agi 7, Int 1-8
Weapons / Armor / Tools
Weapons: machineguns, explosives and pistols. Armor: Light. Tools: Sledgehammer for breaching obstacles. A vehicle is handy for rapid deployment to the front lines.
Hybrid Potential
The Commando’s major weakness is maintaining logistics in the field. The high rate of fire and expensive ammunition of machine guns can result in fatal shortages of war material. Without ammo the Commando goes from devastating angle of death to weak as an anemic kitten. Ammo can be found or bought but for a reliable supply in great quantities it makes sense to take a second job as a Miner and / or Chemist and craft it.
Notes
Trigger discipline and situational awareness are critical for making this build work. For horde night make a huge minefield surrounding pill boxes. Fire in the hold! Duck and cover!
Foot Knight
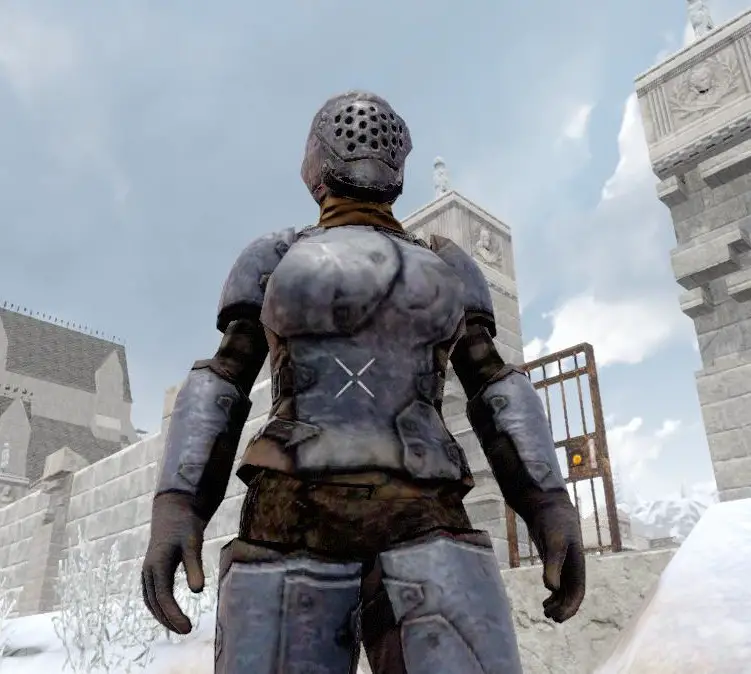
The Foot Knight is a walking, talking human tank. He needs to be because by rejecting cowardly ranged weapons, he is obliged to get up close and personal when fighting and in turn get bashed a lot back for his trouble.
Oh well, at least his mace needs no ammunition, even if his suit of shining armor needs constant maintenance.
Key Perks
The Foot Knight’s weapon is the club, although he calls it a mace for some reason. Of course then, he will go all way with the perk Pummel Pete. His first line of defence is top-to-toe heavy armor so the Heavy Armor perk will help him move in it and make the suit last longer under assault before needing repair. Another aid to keep from tiring while bashing in one face after another is Sexual Tyrannosaurus.
There is more to the Foot Knight’s tankiness than a thick metal skin, he is thick all the way through! The complete tank package also maxes out Pain Tolerance and the Healing Factor. Optionally for a bit more speed to his attacks Flurry Of Blows could be worth a stretch into the Agility tree. Continual battering can take its toll so a few points in Physician can help get more experience points from using meds to heal.
Finally like many warriors he may mostly earn his keep taking hit contracts from the traders. The Daring Adventurer is worth a look for better rewards.
Key Stats
Per 1, Str 10, Fort 10, Agi 1-7, Int 1-9
Weapons / Armor / Tools
Weapons: clubs. Armor: heavy. Tools: Sledgehammer for breaking and entering.
Hybrid Potential
The Foot Knight could be combined with a Castellan for a Castellan that is not afraid to leave the house or a Foot Knight that has a safe place to stand on horde night.
Final Thoughts
If you found this little article fun, informative or inspiring, if you have anything to say or add, then I of solarcrossgames.co.uk invite you to write in using the contact form at the top. I would love to hear from you!
Likewise if you would like to see me attempt a playthrough of any of the builds above and post it to youtube, then let me know! I might even actually do it.